How to Activate Traditional Yeast – A Brenna is Baking Video

Today I am bringing you the very first Brenna is Baking video! The video goes through the various stages of activating traditional yeast for baking bread.

What you will need to activate yeast:

1/2-1 cup warm (but not hot) water (use a small portion of the total water needed for the recipe you are making)

2 tsp. sugar

active dry yeast (use the amount that your recipe calls for)

Here is the video tutorial- I hope you like it!

Steller Story: Sweet Breakfast Bread with Citrus, Apples and Currants

Hello everyone,

Today I am sharing with you my very first Steller Story. This is the first time I have used the app, and I have to say it was a lot of fun! The app allows you to create a story out of a series of photographs and text pages, which all combine together to form a beautiful finished product. Think of it as a jacked up Instagram. So much inspiration!

Steller Story

Steller Story: Sweet Breakfast Bread with Citrus, Apples, and Currants

The recipe I chose for this has been a long work in progress, Originally I had planned to do hot cross buns for Easter, but the recipe did not turn out how I wanted. Ultimately, I ended up with this great loaf that has all of the ingredients of hot cross buns (currants, citrus, spices), but in a hearty whole wheat loaf that is not too sweet, making it the perfect breakfast.

The story (and recipe) can be found here:

https://steller.co/s/4LG84vyyyZh

What is your favourite kind of bread to eat in the morning?

Savoury Mediterranean Scones with Feta, Kalamata Olives, and Pesto

It’s been a cold and rainy week here in Victoria (hello, spring), so I have been hiding in the warmth of my living room, watching the drizzle seeping into everything.

 Mediterranean Scones with Feta, Kalamata Olives, and Pesto

Savoury Mediterranean Scones with Feta, Kalamata Olives, and Pesto

So what does one do when it is grey and cold? Make soup of course! And to go with the soup this week, I chose to make a savoury scone recipe that I dreamt up after tasting a similar one at my local Good Earth Cafe. Good Earth’s mediterranean scone is chock full of olives, pesto, and feta. The scones are made from a wet dough, resulting in craggy edges and a large round shape. I wanted to do a more classic take, inspired by the biscuit recipe my mom uses. Her biscuits are made up of a rich, buttery dough with hundreds of flaky layers, and a clean, triangular shape. No craggy edges here.

The pesto I use here is a simple blend of basil and olive oil that my in-laws make and freeze every year from the basil in their garden. Now I do realize that most of you will not have a similar product readily available, but store-bought basil pesto will work just fine. However, you will need to adjust the salt in the recipe, depending on how salty your pesto is. If the pesto has cheese and salt added to it, I would reduce the salt to about 1/4 tsp, or even leave it out all together. Remember that feta and olives are very salty on their own, so be very careful about adding too much additional salt or you will be running for a water glass.

Scone on plate

Savoury Mediterranean Scones

Mediterranean Scones

Makes 6-7 scones

2 c. all-purpose flour
3 tsp. baking powder
1/2 tsp. salt
1/3 c. cold butter, cut into cubes
1/2 c. chopped spinach (can be frozen, but squeeze out excess water before adding)
2 tbsp. pesto
1/4 c. feta cheese, cut into small pieces
1/4 c. chopped Kalamata olives
scant 3/4 cup milk

Preheat oven to 450ºF

In a large mixing bowl, stir together flour, baking powder, and salt (if using). Cut butter into mixture until it is the size of peas (use a pastry blender or two butter knives). Stir in chopped spinach, pesto, cheese, and olives until everyting is well coated in flour. Slowly pour in milk until a soft dough forms.

Dump dough onto a well-floured surface and knead quickly a couple times. Roll out dough until it is about 3/4 of an inch thick. Cut into desired shape (I did triangles) and place onto a cookie sheet.

Bake scones for 10-12 minutes, or until they are golden brown and risen. Cool on a wire rack until you just can’t take it anymore and need to sample.

These will keep for a few days on the counter in a covered dish, and also freeze beautifully.

I hope to be back here soon with a great recipe I have been working on. In the meantime, what have you been baking?

Vegan Breakfast Muffins

Vegan Breakfast Muffins

Vegan Breakfast Muffins

I have a confession. I am a terrible breakfast planner. I am often running out the door in the morning, so having a quick breakfast is essential. During the summer months a green smoothie or some overnight oats (check out Oh She Glows for some amazing recipes) are my favourite choices. But when it is cold outside I really do not enjoy a cold breakfast, and rarely have time to make a hot bowl of oatmeal before I head out to work or school. So during the winter I like to bake big batches of muffins and freeze them individually wrapped in foil. That way I can pop one into the oven when I wake up and as I head out the door I can grab a freshly warmed muffin to munch on.

Vegan Breakfast Muffins

Vegan Breakfast Muffins

These muffins are my latest obsession. They are full great stuff- oat bran, walnuts, flax, and molasses, which make the muffins satisfying enough to fill you up until lunch. They also have a fantastic mixture of raisins, walnuts, and orange zest that gives them a great crunchy/chewy/sweet texture. I wish I was eating one right now.

Walnuts + Raisins= YUM

Walnuts + Raisins= YUM

The recipe makes about 15 standard muffins, which will keep for at least 3 days on your counter. Or you could double the recipe and freeze them for future breakfasts on the go. You should do the former and then thank me later for incorporating effortless warm muffins in to your morning commute. These are the ways I try and show my love for you. That, and cheesecake.

Vegan Breakfast Muffins

makes about 15 muffins

6 tbsp. water
2 tbsp. ground flax seeds
2 cups all-purpose flour
1 1/3 cups oats bran
1 1/2 tsp. baking powder
1/2 tsp. baking soda
1/2 tsp. salt
1/2 cup brown sugar
1 1/3 cups unsweetened almond milk (or any other non-dairy milk)
1/2 cup grape seed oil
zest of one large orange (about 2 tsp. of zest)
1 tbsp. molasses
1/2 cup raisins (currants would be great also)
1/2 cup coarsely chopped walnuts

Preheat oven to 350ºF. Grease a standard muffin tin with oil or vegan butter.

In a medium bowl, mix together water and ground flax seed and set aside to thicken.

In a large mixing bowl, stir together flour, oat bran, baking powder, baking soda, and salt.

Add the brown sugar, almond milk, oil, zest, and molasses to the flax mixture and mix well. Stir wet ingredients into the dry mixture until they are just incorporated. Do not overmix. Carefully mix in raisins and walnuts until they are evenly distributed.

Flax and water mixture

Flax and water mixture

Fill muffin cups 2/3 full and bake for 20-24 minutes, or until toothpick comes out clean. Allow to cool for several minutes in muffin tin, then remove onto a rack to let them cool completely.

To freeze these, wrap each muffin in aluminum foil and freeze in a large ziploc bag. Remove muffins as you like and reheat them in a 400ºF oven for 12-15 minutes.

I have a lot of other muffin recipes that I make regularly, including blueberry bran, blackberry cornmeal, and pumpkin. Comment below to let me know which recipe you want next, and the winner will be the next muffin post. I hope you have a great week!

Roasted Banana Bread

When I was a kid, my mom would make us banana bread to take in our lunches. She would bake it late at night, letting the smell of the sweet loaf permeate the corners of our bedrooms as we slept. The next day, we would find perfect little slices slathered with salty butter tucked into our lunch kits, and life would just suddenly make sense.

Roasted Banana Bread

Roasted Banana Bread

When it comes to baking banana bread as an adult, I try to keep it as simple as possible. No nuts, chocolate, bourbon, or anything that might take away from the syrupy sweetness of cooked bananas. However, I discovered two very simple additions that take this loaf to the next level: roasted bananas and brown sugar. When bananas are roasted they become ridiculously luxurious, and using brown sugar in place of white gives the loaf the slightest hint of burnt caramel. Trust me, this is classic banana bread at its finest.

photo 2

Classic banana bread with roasted bananas and brown sugar

The recipe is inspired by one of my favourite blogs, Smitten Kitchen, who loves to “jack up” her banana breads with any number of ingredients. If anyone was to convince me that uncooked millet was a delicious addition to banana bread, it’s Deb. But for now, I am happy with my nostalgic, uncomplicated loaf.

photo 3

Roasted Banana Bread

makes one loaf

Adapted from Smitten Kitchen

3 ripe bananas, unpeeled
1/3 cup melted butter
1/2 cup brown sugar
1 egg. beaten
1 tsp. vanilla
1/2 tsp. salt
1 tsp. baking soda
1 1/2 cups all-purpose flour

Preheat oven to 350ºF. Grease a standard loaf pan.

Place unpeeled bananas on a cookie sheet and roast until they are fragrant and skins are blackened, about 15-20 minutes. Let cool until you can handle them. Carefully peel bananas and place them into a large mixing bowl. Add melted butter, brown sugar, egg, and vanilla and mix well. Add salt, baking soda, and flour and mix until just combined. Pour into greased loaf pan and bake at 350ºF for 50-60 minutes, or until toothpick comes out clean.

Remove loaf from pan and allow it to cool completely before slicing. Slather a slice with some salty butter and relish the moment when everything makes sense.

Do you like your banana bread classic or modern? Nuts, chocolate, bourbon? I would love to hear what you think! Also, if you give this a try, let me know how it turned out. Happy roasting!

Brenna

Mom’s Blueberry Pie

Give me any kind of fruit dessert and I am a happy woman. Apple Crumble, Rhubarb Crisp, Pear Pie– these are just a few of my favourites. But when it is March and the apples are mealy from months of storage and rhubarb is still a far-away dream, blueberry pie is the way to go.

bluepiefinish

We celebrated Pi Day with Mom’s blueberry pie.

The wonderful thing about blueberry pie is that it works just as well with frozen berries as it does with fresh. Every July, we buy flats of blueberries and flash freeze them on cookie sheets. We store them in freezer bags and pull them out for pancakes, muffins, and (naturally) pie. This summer, I highly recommend you do the same. A frozen in season blueberry tastes so much better than the fresh you can buy this time of year (for no less than $6 a pint!)

blupieslice

This recipe comes from my partner (D)’s mom. His mom is known for her amazing pies (that pear one I mentioned earlier is hers and it comes with a delightful crumb topping that is to die for). This recipe is as classic as it gets. A double crust gets filled with syrupy blueberries and lightly dusted with sugar to finish it off. The ice cream is not optional in our home.

piepics

Three steps to homemade pie dough.

Now I know that making homemade pie crust seems daunting, but it really is not so bad. There are three steps to making crust, and if you follow them you will have a delicious, flaky crust. The first step is to cut very cold butter into a flour/salt/sugar mixture until the butter is the size of peas. The next step is adding just enough ice water to bring the dough together and then refrigerating the dough until it is firm (about an hour). The final step is rolling out the dough thinly enough to get a flaky crust that cooks evenly. Anyone can make pie crust at home. Ditch those store-bought boxes and get your hands dirty!

Mom’s Blueberry Pie

makes one (9-inch) pie

For the crust:

2 1/2 cups all-purpose flour
1 tsp. salt
1 tsp. sugar
1 cup cold unsalted butter, cut into small pieces
1/4 to 1/2 cup water (I used just over 1/2 cup)
milk, for brushing
1 tbsp. sugar, for sprinkling (I used vanilla cardamom sugar, but plain is fine)

For the filling:

5 cups frozen blueberries (fresh is fine also)
3/4 cup sugar
1/4 cup all-purpose flour
1 tbsp. lemon juice

Make the crust: In a large mixing bowl, stir together flour, sugar, and salt. Cut in the butter until it is the size of peas. Slowly stir in ice water until the dough just comes together. Quickly form into a ball, kneading as little as possible, and divide it into two. Wrap in plastic and refrigerate until firm, about an hour.

Make the filling:

Preheat oven to 400 ºF and place rack on lowest spot available. Grease a 9-inch pie plate.

Mix the blueberries, sugar, and flour and let sit for 15 minutes. Roll out one ball of dough until it is slightly larger than your pie plate. Lay rolled out dough into pie plate. Pour blueberry mixture into crust and drizzle filling with lemon juice.

blupieberry

Blueberry pie almost ready for the oven.

Roll out your second ball of dough until it is roughly the diameter of your pie plate. Cut a few slices into the dough to let steam escape. Carefully place the dough on top of the filling and crimp edges of bottom and top crusts together. Brush top of pie with milk and sprinkle on sugar.

Mom's Blueberry Pie

Mom’s Blueberry Pie

Place pie on a large cookie sheet (to catch any spills) and put it on the lowest rack in your oven. Bake at 400ºF for 20 minutes, then lower oven temperature to 350ºF for another 50-70 minutes, or until crust is golden brown and filling is bubbling. Allow pie to cool completely and then refrigerate until ready to eat. The filling will thicken as the pie cools, so make sure to serve it either room temperature or cold.

Hearty Oatmeal Chocolate Chip Cookies (Mountain Cookies)

The other day I came home and had the sudden urge to dunk a thick, chewy cookie into a cold glass of milk. I wanted something that reminded me of a cookie I once ate at a friend’s house. She called them “mountain cookies”, and they were filled with oats, chocolate, and raisins. Whenever I think of those cookies I imagine being snuggled up in a log cabin watching the snow fall with nothing to do but read books, drink tea, and eat cookies. So after a cold walk home (yes, I do realize that last week I posted a summer dessert recipe and boasted about trees being in bloom), I needed some comfort. But I was out of raisins, so I created my own version of mountain cookies, and –dare I say it?–I like them more.

Hearty Oatmeal Chocolate Chip Cookies

Hearty Oatmeal Chocolate Chip Cookies

The secret to achieving the chewy, moist texture that makes these cookies so irresistible is an ingredient that I threw in at the last moment: coconut. The key is to add a small amount (1/4 cup) so that the cookies don’t taste of coconut but benefit from the texture of it.

Mountain Cookies ready for the oven

Mountain Cookies ready for the oven

Hearty Oatmeal Chocolate Chip Cookies 

(Mountain Cookies)

Makes about 19 cookies (and will easily double)

For the Dough:

1/2 cup butter, softened
3/4 cup brown sugar
1 egg
1 tsp. pure vanilla extract
1/2 cup flour
1/4 cup whole wheat flour
1 1/2 cups old-fashioned rolled oats
1/4 cup unsweetened coconut
1/2 tsp. baking powder
1/2 tsp. baking soda
1/2 tsp. salt
1/2 cup semisweet chocolate chips

Preheat oven to 375º

In a bowl of electric mixer, cream together butter and sugar until light and fluffy (this can also be done with a hand mixer in a large mixing bowl). Add egg and vanilla and beat until well incorporated.

In a separate bowl, mix together flours, oatmeal, coconut, baking powder, baking soda, and salt. Slowly add to butter mixture, mixing until the flour is just combined. Add chocolate chips and mix.

Roll about 1 tbsp. of dough between your hands and flatten slightly. Place on a large cookie sheet about 1 inch apart (these do not spread very much). Bake for 8-9 minutes, or until edges are slightly golden and centres are moist.

Allow cookies to cool for about 5 minutes on sheet, then place on a wire rack to cool completely. Grab a glass of milk, your book, and a plate and go enjoy the afternoon. The dishes can wait.

photo

These will keep well on the counter for at least five days (good luck with that). I hope that you can take a bit of time this weekend and give these a try. That mountain lodge may just be in my mind, but these sure brought it a little closer to my heart. I hope they do the same for you.

Orange Creamsicle No-Bake Cheesecake

Orange Creamsicle No-Bake Cheesecake

Orange Creamsicle No-Bake Cheesecake

I love winter. Now that we live in Victoria winter no longer involves snow and ice, and I really did miss it at first. I still miss the silence that comes with a heavy snowfall and the magical feeling the first flakes of the year bring. However, I have adapted and now I relish the short and dark Island winters. Now, nothing beats cold mornings, fog, and rainy days spent inside with a good book and a cup of tea. Plus watching the trees start to bloom in February has its perks, too.

Blooming cherry trees this week.

Blooming cherry trees this week.

So now that it is starting to feel like spring I was in the mood for a lighter dessert, and this no-bake cheesecake was born. The inspiration came from two places: the latest edition of Alive magazine, which featured a lovely raspberry no-bake cheesecake, and this gelatin-free version from Food Doodles. If you are still stuck in the midst of winter, think of this cheesecake as a vacation for your mouth. One bite of this creamy vanilla soaked orange filling will bring you right back to summer days as a kid eating popsicles and making sandcastles.

I wanted to avoid a jello-like consistency in favour of a lighter, softer texture, which is achieved simply by combining whipped cream cheese with greek yogurt and the smallest hint of sugar. And because it is citrus season, I decided that a creamsicle cheesecake was in order. Who doesn’t love the combined flavours of orange, vanilla, and cream cheese? The result is a delightfully light cake that is not too sweet and is bursting with orange flavour.

IMG_1526

This cake comes together in just a few minutes, and is the perfect solution for days when turning on the oven just seems like a little too much work. It is critical that you let it sit overnight to thicken and allow the flavours to meld together. Trust me, it is worth the wait. I am already thinking of various combinations for different versions. Chocolate cherry almond, anyone?

Orange Creamsicle No-Bake Cheesecake

Adapted from Food Doodles

makes one 8 or 9 inch cake

For the Crust:

1 2/3 cup graham cracker crumbs
1 tbsp. brown sugar
1/4 tsp. salt
6 tbsp. melted butter

For the Filling:

250 g (or 8oz., or one block) cream cheese, softened
3/4 c. orange flavoured yogurt (I used Western Family Blood Orange Greek Yogurt)
3 tbsp. granulated sugar
1/2 tsp. pure vanilla extract
1/2 tsp. pure orange extract
zest of 1 large orange
1/4 c. freshly squeezed orange juice

To make the crust, combine graham crumbs, salt, and brown sugar. Stir in melted butter until well-combined. Press firmly into an 8 or 9 inch springform or round cake pan. Place in the fridge for an hour (or, as I did, put it in the freezer for about 20 minutes to let the butter harden).

IMG_1520

IMG_1521

Make the filling:
In a large bowl, beat together cream cheese, yogurt, and sugar until well combined. Add vanilla and orange extracts and the orange juice and zest. Stir well. Pour over cooled crust, spreading evenly. Cover with plastic wrap and refrigerate overnight.

No-Bake Cheesecake ready to be refrigerated.

No-Bake Cheesecake ready to be refrigerated.

Notes: If you cannot find orange-flavoured yogurt, I would try using vanilla. However, you may need to increase the orange extract to 1 tsp. The nice thing about this batter is you can taste it as you go and adjust it to your liking.

I lined my pan with parchment paper, but I do not think it was necessary. If anything, it made it harder to remove nice slices from the pan. I would skip this next time.

I hope you give this one a try; it really is wonderful.

Brenna

Raisin Cupcakes: The Old-Fashioned Treat You Should Make this Weekend

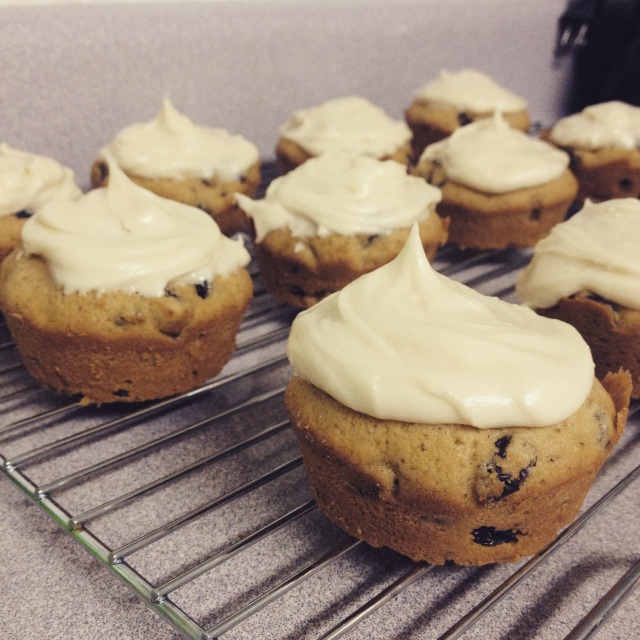
I know what you are thinking. The words “raisin” and “cupcake” do not belong together. But trust me, the moment you pull these out of the oven and your kitchen fills with the smell of hot, buttery nutmeg, you will thank me for introducing you to this kitschy little cake. Plus, from start to finish these take less than an hour to make, so you can spend your Saturday afternoon curled up with a cup of tea and a cupcake rather than doing dishes.

IMG_1513

Raisin Cupcakes

This recipe is my grandmother’s, and has been a family tradition since my dad was a little kid. He has the original recipe written out by my grandmother, her careful handwriting spattered with vanilla and dried icing from years of baking.

These cupcakes are different from the modern rendition of the dessert. There is relatively little sugar in these (less than one cup in the batter), and you will not find them with an inch of overly sweet icing masking the flavour of the cake. If you are like me and hate that inch of icing, take comfort in the fact that we are not alone (warning: hilariously expletive language).

IMG_1509

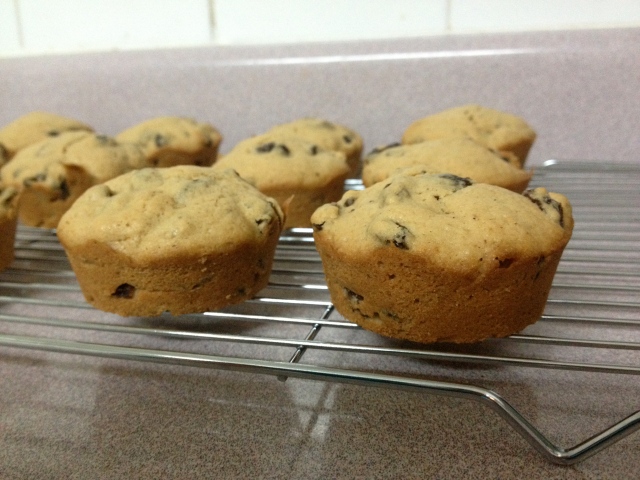
Raisin Cupcakes, pre-icing.

Instead of that dreaded inch of sugary icing, these are merely swiped with the faintest skiff of butter icing, just enough to take them to the next level. But the best part is not the icing or the butter; it’s the raisins. I know that raisins are one of the most hated dried fruits (except for maybe the terribly misunderstood prune). But here, the raisins are made soft and plump from a quick soak in boiling water, which is then added to the batter to give it a syrupy, caramel flavour. If that doesn’t make you run for your muffin tin and spatula, I don’t know what will.

Raisin Cupcakes

Makes 12 cupcakes

1 1/4 cups raisins
2 c. water
1/2 c. butter, softened
3/4 c. brown sugar
1 egg
1 tsp. pure vanilla extract
1 1/2 c. all-purpose flour
1 tsp. baking powder
1 tsp. nutmeg
1/4 tsp. salt

Preheat oven to 375º F. Butter a standard muffin tin.

Boil raisins in 2 cups of water for five minutes. Drain, reserving 1/2 cup of raisin water. Cream together butter and sugar until well combined. Add egg and vanilla and mix thoroughly. Add raisin water (best if it has slightly cooled) and mix. Add flour, baking powder, nutmeg, and salt and mix until dry ingredients have just combined. Fold in drained raisins.

Fill each muffin cup 2/3 full. Bake at 375º for 18 minutes, or until tops are springy and edges are beginning to brown. Run a butter knife around the edges of each cupcake, then let them cool in the tin for five minutes before removing. Remove from tin and let them cool completely. Lightly ice with butter icing (recipe follows).

Butter Icing

Makes enough for 12 lightly iced cupcakes

4 tbsp. butter, softened
1  1/2 c. icing sugar
1/2 tsp. pure vanilla extract
1 -2 tbsp light cream or milk

Cream together butter and icing sugar with a wooden spoon. Stir in vanilla and enough cream to make it soft and spreadable, but not runny. Ice cupcakes with approximately one tablespoon of icing each. Try not to cry when taking first bite.

I hope you enjoy these as much as I do, and that soon enough your own page will be spattered and wrinkled from repeated use.

What is your favourite type of cupcake?

Bread Machine Focaccia

A few months ago, my parents gave me their old bread machine. When I say old, I mean this thing made bread for my sister and I when we were kids. My first reaction was to not accept it, thinking that there was no way it could still produce a decent loaf of bread. I was so very wrong.

IMG_1495

Focaccia fresh out of the oven

This homemade focaccia has become a staple in our house. The top is a delicious crispy crust of olive oil, salt, and pepper that contrasts wonderfully with the soft, doughy interior. Focaccia is perfect for dunking in sauce, swiping up excess salad dressing, floating on top of a bowl of soup, or just eaten straight out of the pan. Basically, this bread will improve not only your day but quite possibly your entire life. Yes, it really is that good.

Bread Machine Focaccia

Makes one (9×13 inch) loaf
From start to finish, this recipe takes 2 hours max. So yes, you can have warm bread with dinner tonight. You’re welcome.

For the Dough

1 cup lukewarm water
2 tbsp. olive oil
3 cups all-purpose flour
1/2 tsp. salt
2 tsp. bread machine yeast

For the Top

2 tbsp. olive oil
coarse salt, to taste
freshly ground black pepper, to taste

Make the dough: Place all of the dough ingredients into bread machine in the order directed by the manufacturer (they are listed in the  order my bread machine calls for them). Set dough cycle; press Start.

Preheat oven to 400º F. Remove dough from machine when cycle is complete. Pat dough into an ungreased 9x 13 inch baking pan, stretching out the dough as necessary to fit. Dimple the top of the dough with your fingers. Drizzle olive oil evenly over the top, spreading it around with your fingers until the entire top of the dough is covered evenly. Sprinkle with salt and pepper generously.

Focaccia ready for second rise.

Focaccia ready for second rise.

Cover the pan with plastic wrap and let it rise for another 20 minutes on top of the stove. Remove plastic wrap and place into preheated oven. Bake for 20-25 minutes until nicely risen and beginning to become golden brown. Remove bread from pan immediately and place onto a cooling rack. Allow it to cool for at least 10 minutes (I know, it’s hard) before slicing. Enjoy, and plan on making this a weekly ritual in your home.

Ready for the oven

Ready for the oven

Don’t have a bread machine? No problem! This dough can be made with good old-fashioned elbow grease. Simply replace the bread machine yeast with traditional yeast* and knead the dough by hand for about 15 minutes before letting it rise for 1 1/2 hours in an oiled bowl covered with plastic wrap and placed in a warm, draft-free place (a closed oven with the light on is my favourite place for rising dough). Then proceed as the recipe says.
*If using traditional yeast, you must activate it by stirring  it into the lukewarm water with one tsp. of sugar until it becomes frothy (about 10 minutes).

I think I owe my parents a bottle of wine.